Model Building


As I left off last time I had decided to buy a Walthers 90’ turntable instead of scratchbuilding.

Placing it into the rough cut 11” hole I had already cut, it was clearly going to need a bigger (and more perfectly circular!) hole.
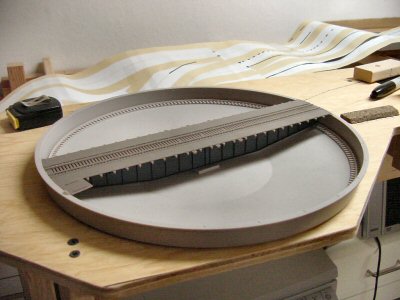
The Walther’s turntable needs a 12-1/2” diameter hole. On my trackplan I superimposed that size hole where I had the smaller hole and it was a tight fit, but it did fit.
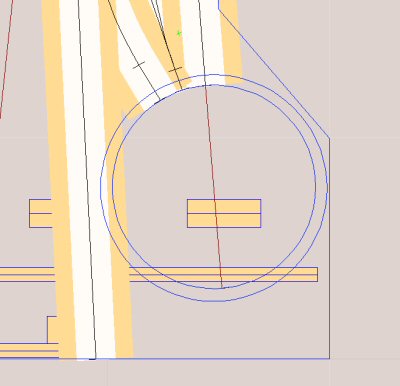
It is a good idea to read the instructions: closer reading reveals that the turntable needs a 12-5/8” hole. As usual – everything ends up taking a bit more space than you initially plan.


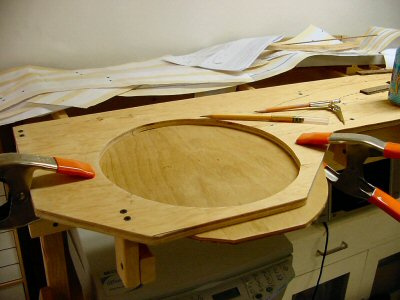
First I needed to draw a really accurate circle on the plywood. Normally this is no big deal but there’s a hole in the plywood where the center needs to be so I clamp a piece of ¼” plywood over the hole from below.

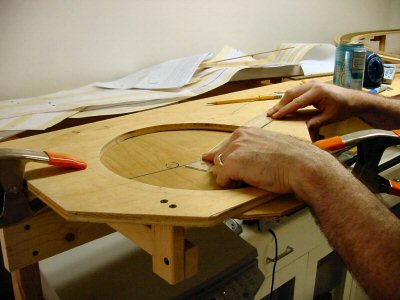
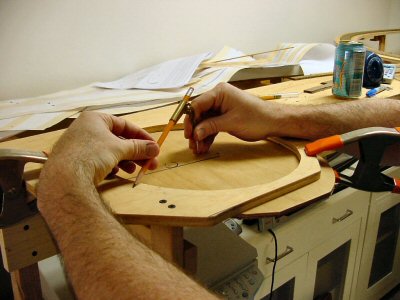
Next I need to mark the center of the circle. The approach tracks to the turntable are already laid out and their centerlines should cross exactly at the center of the circle. Using a flexible clear plastic ruler I draw lines out and where they cross will be the center of the new enlarged hole.

Drawing the first line.

Drawing the second line. Where it crosses the first is the center for the new hole.
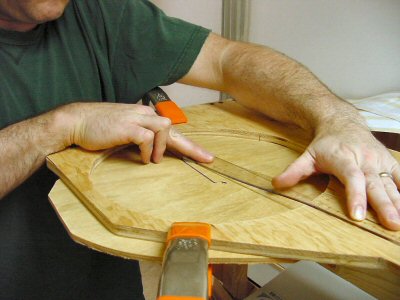
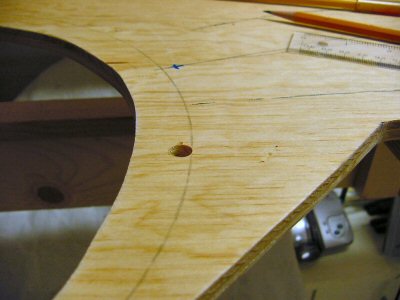
From the center just marked I use an inexpensive compass and a sharp pencil set for a 6-5/16” radius to gently mark out the new circle’s outline. This kind of compass works fine as long as you use very little force.

Drill a starter hole for the saber saw.

Cut the hole

Somehow I forgot to take any photos of this step. Maybe it was because I was holding the saw with both hands!

Anyway, I carefully cut the hole with a new blade in the saber saw and with a little bit of shaving the new hole works great.

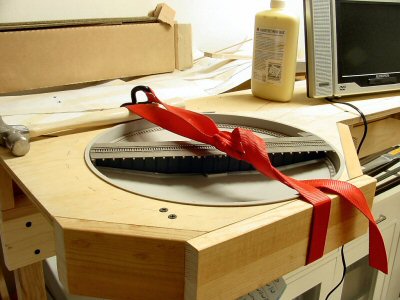
The edge of my plywood base for the yard area is now dangerously close to the edge of the turntable so I immediately add some pine 1×3 facing boards and use a cargo strap to hold them while I glue and screw them in place.

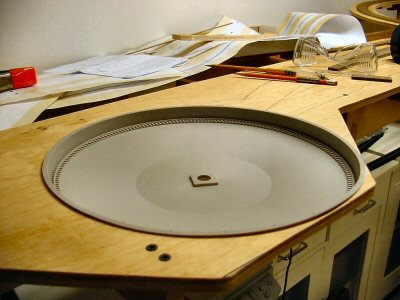
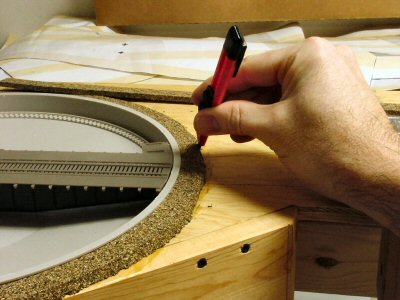
The plastic lip of the turntable is exactly the same thickness as the ties under my track. Since my track is riding on cork roadbed I need to raise the turntable to match the track height. The easy way to do this is to run a ring of roadbed around the turntable hole to use it as a riser. Then I just cut away the bevel where the approach tracks come in.


I still have to actually assemble the turntable but I’m moving on to laying the track first.
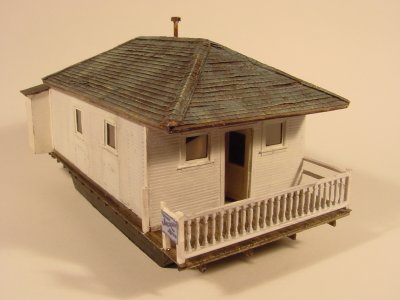
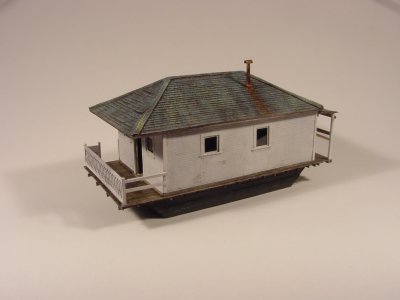
The Tiburon Railroad-Ferry Depot Museum is building an HO scale model of the Tiburon railroad yard of the Northwestern Pacific Railroad as it was in 1909. After several meetings with the the permanent staff I was informally commissioned to build some of the structures starting with “Ark Number 4.”

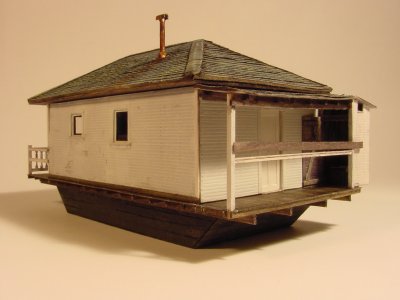
“Arks” are local (Marin county, California) slang for what were more commonly known around the country as “shanty boats.” Around the 1880′s and 90′s it became very popular to vacation in home-made houseboats around the San Francisco Bay. Known locally as “arks,” these houseboats, every one unique, once numbered in the hundreds. None survive afloat but many were hauled up on land to serve as housing for railroad and other local workers looking for low cost “funky” housing. I plan on having many of these Arks in and around my 1920′s Tiburbon.

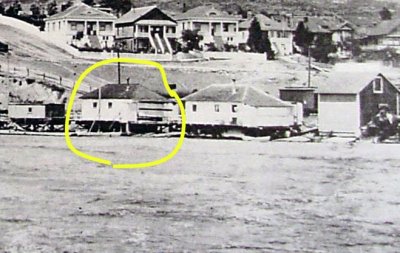
In 1909 several arks lined the Bay shore along the approach to the Tiburon yard. My sole source of data for this building were enlargements of this photo from an old post card:

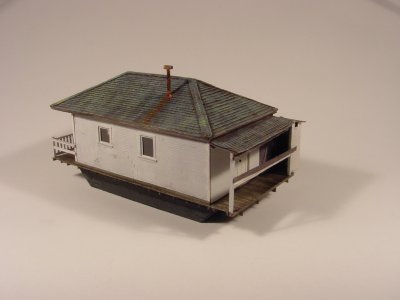
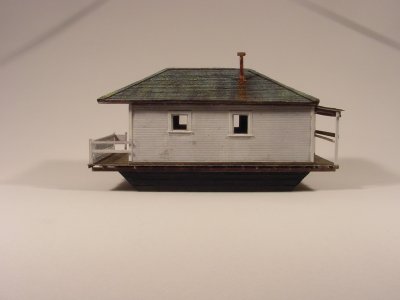
After estimating dimensions from the photo and negotiating with the museum staff how the two sides you can’t see might have looked, I proceeded to build my model. Museum requirements were to use materials compatible with at least a 50 year lifespan. Styrene is prohibited for any use but small details. White metal castings are also prohibited. In some ways this meant going back to techniques popular in the 1960′s: Strathmore, acid-free paper, wood, white glue.


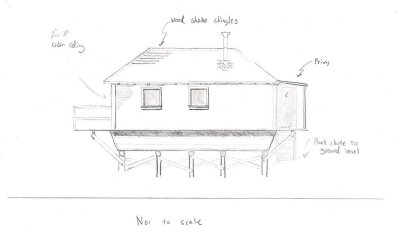
A drawing I made before construction.

I’ve been dabbling at model building (cars, trains, planes, ships) since my pre-teen years and while I have 30 years or so of experience this was my first stab at really scratchbuilding. Fortunately, I have been an avid reader of Model Railroader and the Narrow Gauge & Short Line Gazette and I drew heavily on all those articles and pictures to help me build this model.

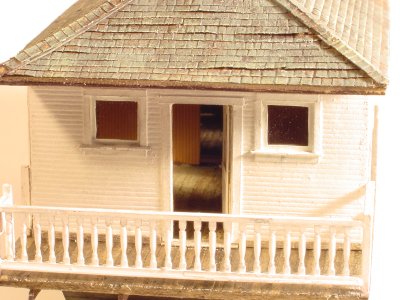
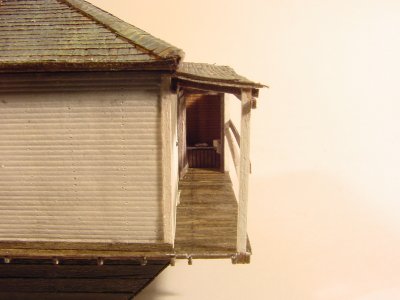
The scale is 1:87 HO. Overall dimensions are 33′ x 16′ not counting the not-so-out-outhouse. Roof is Campbell shingles on a solid wood core. Walls are hand-scribed Strathmore on a basswood core. Windows are real (damn thin) glass. Floor is board-by-board scale 1x4s.

During initial track planning I specified an 80′ turntable at Tiburbon. Eighty feet looked long enough given the types of engines I wanted to run. This worked out to 11 inches in diameter and this felt ok given the overall size of the scene.

The plan was to scratchbuild the turntable but those of you who have done this before know: it’s really easy to build a turntable badly. Fortunately, I realized this immediatly after casually cutting a rough 11 inch diameter hole in the main track sheet of Tiburbon.

First: a rough hole will not do the job.

Second: it became clear that a precisely built and aligned pit, bridge, and approach tracks are required or I will be very sorry indeed.

Third: since this turntable is in the IMMEDIATE foreground of the scene it must be tidy looking.

Enter the Walthers 90′ Turntable kit (unpowered) on sale for $31.98.

I’ve had spotty to poor experiences with Walthers plastic kits but I figured for $32 I’d get at least a few pieces I could use. So far it looks great. Simple and tidy. With some easy modifications will turn smoothly. I plan on turning by hand since the table is right at the edge (will I regret this?).  

I’ll have to enlarge the existing hole but it basically fits and now I can turn a USRA 2-8-2 Mikado if I want. I’ll post details on cutting and installation soon.

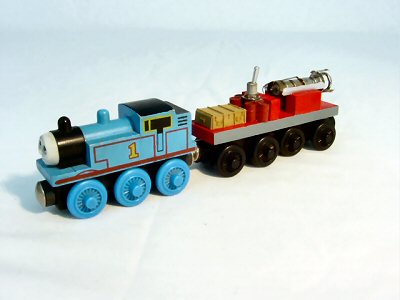
My son has always been totally into Thomas the Tank Engine. As a parent, Thomas is ok: stories about mild interpersonal issues between locomotives, calm music, sedate editing style. As a Model Railroader, Thomas is great stuff.

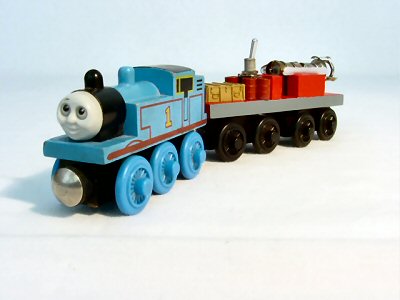
When we saw Thomas and the Jet Engine I got the idea to make a jet engine to go with his wooden Thomas set.

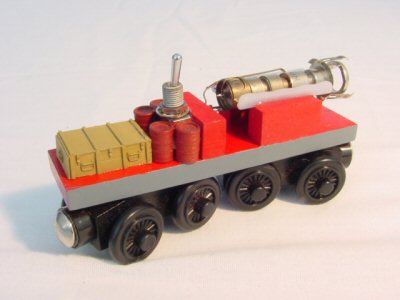
I used a kind of weird “fire engine/crane” car as the basis. I stripped off the parts above the deck and repainted.

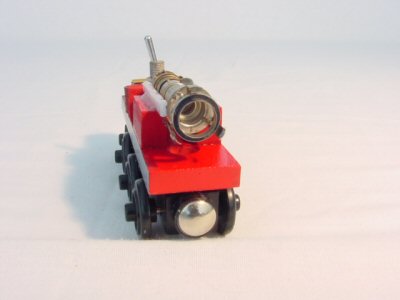
Next I added a old toggle switch, some Campbell oil drums and a Verlinden resin crate.

However, the crowning piece is the “jet engine” made from an old black and white TV set electron gun.

« Previous Page