IHC 4-4-0 as NWP 8

I’ve always loved NWP number 8 as shown in this 1915 view below.

NWP 8

I’d like to try to use this IHC 4-4-0 Old Time American as a starting point to model NWP 8.

IHC N.Y.N.H. & H 4-4-0

These models have been around since the 1970’s and have tender drive. They’ve been sold under several names (IHC, Rivarossi, AHM, and Pocher). They are not really HO scale (3.5 mm = 1 foot) but rather are OO scale (4.0 mm = 1 foot, running on HO track). So why use them? I bought 3 on sale for around $30 each and I used to have one when I was a kid so I’m interested in seeing how good a model I can make based on this chassis.

This particular model has an updated pilot with a knuckle coupler (a dummy as shipped) and a straight, albeit not plain, stack.

I’ll start with a design sketch to get an idea what the model would look like. I took the photo of the stock engine above and placed it on a lighted tracing table.

Picture 007

Then I taped a sheet of paper on this and traced out the engine. The cab, headlight, and tender are embellished with the changes needed to bring the appearance closer to NWP 8.

Picture 006

Note that I copied the model, warts and all. This will be a drawing of the model based on an IHC chassis, not a drawing of a real engine.

Picture 005

As I sketched in changes I referred to my picture of NWP 8.

The proposed cab will be larger, metal, and pushed forward a bit. I also drew in an air compressor interrupting the walkway, a generator in front of the steam dome, and engine brakes between the drivers.

Picture 003

The most significant change I’m planning is to lower the forward frame. As a digital drawing it was trivial to cut and paste the frame about a scale foot lower. The final drawing shows that these changes will yield an attractive engine.

IHC 4-4-0 as NWP 8

Small, nimble on the rails and with beautiful proportions, the classic 4-4-0 “American” has always been one of my favorite engine types. As I mentioned in my last post, the Northwestern Pacific Railroad was powered almost exclusively by small 4-4-0 and 4-6-0 engines. This is one of the great things about modeling the NWP on the limited size of a model railroad since small engines help create the illusion of greater layout size and mainline distance.

Exact RTR (ready-to-run) models of NWP engines are not available. Consistent with my overall modeling philosophy (plausible but free-lanced), I’m going to examine the engines of the NWP and build engines for my layout that are consistent with the spirit of the prototype. My goal is to build plausible and reasonable, while not exact, models. Understanding the prototype well enough to build things and make decisions consistent with the way the builders and mechanics of the NWP did things is what I enjoy.

The Americans on the NWP in the 1920s fell into two broad groups: old engines built in the 1870s and 1880s — some twelve engines and a “new” group of seven built between 1904 and 1914.

The Old Engines

By the 20s, the older 4-4-0s had been in service between 40 and 50 years and had been significantly updated and altered from their as-built appearance. As built the engines would have looked much like these shown below:

Grant 4-4-0 1873 Grant 4-4-0 1873

Baldwin 4-4-0 1871 Baldwin 4-4-0 1871

Both of these engines are standard “catalog” offerings and are therefore typical engines. Compared to the mechanical standards of the 1920s these engines are missing many pieces of equipment:

1920-29 Standard Equipment:

  • Engine brakes
  • Knuckle couplers
  • Air pumps and associated hardware
  • Electric lights, generators and associated equipment
  • Oil burning modifications (in the NWP case)

While engines may have left the factory looking pretty similar, railroads would generally shop engines only when something broke or needed to be done to meet new requirements (compatible couplers, air brakes, etc.). Individual engines in their 50 year trek to their 1920 appearance would have been shopped and upgraded on unique schedules. In this way each of the old Americans on the NWP looked quite different from each other by the 20s.

NWP 8 Engine 8 was an 1881 Baldwin product with 63” drivers, 15×24 cylinders and weighed 71,000 lbs. By 1915 it looked like this:

NWP 8

Engine 8 has received minimal modification beyond the standard equipment listed above, a new metal cab, and a new pilot. This is probably not what the engine looked like by the 1920s but I love the proportions of this engine and will likely model it as seen above.

NWP 9 An 1883 Grant product, number 9 had 59” drivers, 16×24 cylinders and an 86,300 lb. engine weight. Number 9 was heavily modified in its lifetime and in the 1920s probably looked something like this 1935 view.

NWP 9

Engine 9 has an entirely new boiler and obviously mismatched pilot truck wheels.

Transition between the Old and New 4-4-0s

Boiler location: In the 20th century as scientific principals were increasingly applied to locomotive engineering, an emphasis grew on firebox design, boiler pressure and superheating. For the classic 4-4-0 (shown in cutaway below) the location of the firebox low between the engine frames severely limited the size of the grate and therefore the amount of boiler horsepower that could be generated.

Baldwin 4-4-0 1871 cutaway

The solution was to raise the boiler centerline so that the bottom of the firebox was completely above the engine side frames. As early as the 1888 view shown below this techniques came into use. However, while wider than before the firebox is still constrained to fit between the driving wheels.

PRR 4-4-0 1888 noted

One of the ultimate limitations on the 4-4-0 design is that increasing the firebox size further was never seen as practical. On more modern engines with different wheel arrangements the boiler was raised even higher so that the firebox and grate could be carried completely above the driving wheels and widened to the width of the engine. NWP 4-6-0 number 181 below shows this kind of configuration.

NWP 181

Extended firebox: Comparing the Baldwin 1871 with the PRR 1888 drawing also note the difference in how far the smoke box (the part of the boiler the smokestack is mounted on) extends forward. To hopefully enhance complete combustion, the “extended” smoke box became common (but not universal) on new and rebuilt engines.

Superheating: Superheaters were added to locomotives by changing the boiler design such that steam lines were fed back into widened fire-tubes in the boiler increasing the temperature of the steam and thereby increasing the amount of work the steam could do. This reduced fuel and water consumption for a given amount of power produced. On an old engine superheating is typically only signified by the change from slide valves to piston valves .

Variously updated 4-4-0s on the NWP in the 1920s

This is not a complete breakdown and I picked the following engines because I find them the most interesting.

NWP 10 was a twin sister engine to number 9 (Grant numbers 1665, 1664, respectively) but by 1920 appeared highly modified and updated.

NWP 10

Fully updated with all the modern (1920s) conveniences. Slide valves (superheated), new boiler, air and electrical equipment.

NWP 17 was a Rogers 1889 product with 63” drivers, 17×24 cylinders, and 87,300 lb. engine weight.

NWP 17

In this 1927 view the engine appears to still have its original boiler since the steam dome is old-style location directly over the firebox and the smoke box is not extended forward. The engine has air and electrical equipment.

NWP 20 was a Rogers 1884 product (older than 17 above) with 62” drivers, 18×24 cylinders and 93,800 lb. weight.

NWP 20

In this 1923 photo the fluted domes on number 20 might lead you to think that this is the original boiler. However, my best guess is that the boiler was added around 1917 and the old domes were apparently reused.

NWP 21 was a Baldwin 1904 product with 69” drivers, 18×24 cylinders, and 117,350 lb. weight.

NWP 21

What a difference a few years makes! Number 21 is much heavier than the older engines and in this 1936 photo looks quite modern with the exception of the slide valves.

NWP 22 was a 1908 American product with 69” drivers, 18×24 cylinders, and 128,500 lb. engine weight.

NWP 22

Fairly modern engines but still with slide valves in this 1931 view so presumably not superheated.

NWP 52 was one of the last batch of 4-4-0s purchased by the NWP in 1914. These had 63” drivers, 19×26 cylinders and a hefty 158,500 lb. engine weight.

NWP 52a

These engines were more than twice the weight of old number 8. Note the modern piston valves and Walschaerts valve gear.

Southern Pacific 4-4-0s

For comparison and more modeling ideas I have some photos of 4-4-0s from the Southern Pacific since SP was one of the NWPs corporate parents and some mechanical influences are evident.

sp1421 in 1924

SP 1421 is shown in 1924. The thing I like is the headlight moved to the center of the smoke box front per SP practice.

sp1358 in 1923

SP 1358 is shown in 1923 and other than air and electrical is looking pretty old fashioned indeed. The relatively un-altered appearance of this engine is my justification for carrying forward NWP 8′s ultra-cute 1915 appearance forward to the 20′s.

The Northwestern Pacific Railroad was an amalgamation of some 60 different railroad companies and was the result of a business agreement between the Santa Fe and Southern Pacific railroads to jointly own and run one railroad through a rugged and sparsely populated region of northern California. The NWP’s 300 mile route ended up full of sharp curves, bridges, tunnels, and short steep grades.
Despite the railroad’s diverse beginnings the motive power roster was remarkably simple in the 1920’s and 4-4-0 and 4-6-0 locomotives provided nearly all mainline power. The only trend through this period is as 4-4-0’s built in the 1880’s wore out they were retired while 4-6-0’s were purchased and maintained.
The chart below shows the numbers of different engine types in this period. Note that the NWP had five 0-6-0 switchers and five Moguls (2-6-0) in this period so their lines overlap.

Graph1

Averaged over the 1920s, here is a pie chart of the different engine types. Americans and Ten-wheelers clearly dominate.

Pie1

On my NWP I plan on having lots of 4-4-0s and 4-6-0s but I’ll also have a 2-10-0 or two (surely those cheap Russian decapods would have been attractive?), some 2-8-0s and one small 2-8-2.

.

Picture 076

Ok, I’m still not getting to my trains. I had this pre-painted 1:25 scale AMT 1962 Pontiac Catalina model that I had started and I needed to get it off my workbench. I had started it thinking “Prepainted, it will take no time to build.” Ugh.

The paint job provided was quite good but because all the parts were painted I had to use Crazyglue for all assembly. The model also has serious fit problems in the front end.

If you can’t make it perfect, what to do? Make it completely imperfect. I decided to weather the car as if it had severe flood damage and I came up with an extremely lazy way to do it. I dunked the whole car in diluted latex paint.

First I took a large plastic food storage container large enough to place the car inside.

Picture 034

Next I got my special “mud” latext paint and poured enough to cover the bottom about a quarter inch deep. This color is basically Olive Drab.

Picture 035

I filled up the container with water up to the level I wanted the car submerged and stirred up the diluted paint with a stick.

Picture 037

Each evening over the next week I’d scoop up some of the “muddy water” and baste the car, wetting it completely. At the end of the week I pulled the car out and let it dry.

Picture 067

Picture 068

Picture 065

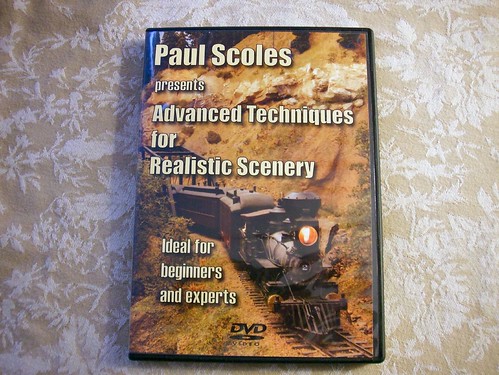
Paul Scoles DVD

I first became aware of Paul Scoles’ work when I saw the “Scenery—Gazette Style” series in Narrow Gauge and Short Line Gazette in the late 1970’s. His techniques always struck me as elegant and relatively easy to follow. His trendsetting photography also made the work look good.

Paul has come out with a DVD based on scenery he’s building for his Sn3 Pelican Bay Railway and Navigation Company layout. I bought my copy from Paul directly through his website at http://www.paulscoles.com/ .

The DVD is excellent and runs over two hours covering

  • Rock casting, coloring, and installation
  • Ground cover using natural materials like decomposed granite
  • Construction of fir trees
  • Construction of deciduous trees using several products from Scenic Express
  • Building a good looking forest from these trees
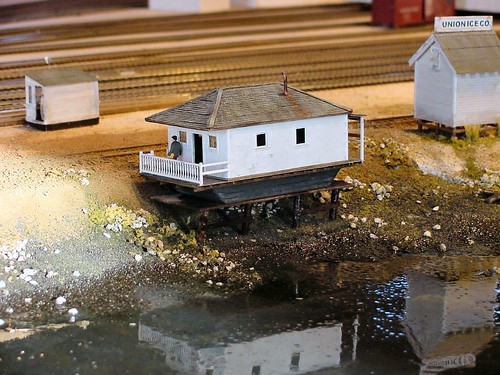
  • Building scenery around structures (although structures on flat-ish ground is all that’s really covered)
  • Scenery concept and design: planning how progression and change in the scenery as you move around the layout can create the impression of distance and changing climate

I highly recommend this video and I’ll be re-viewing it often as I build.

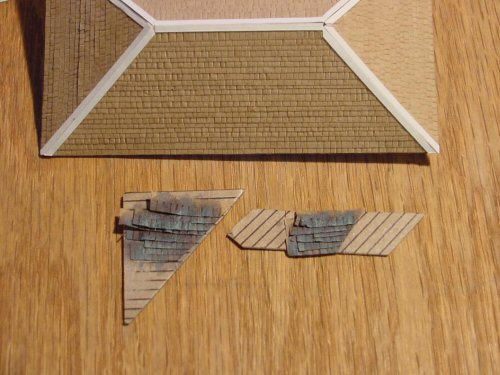
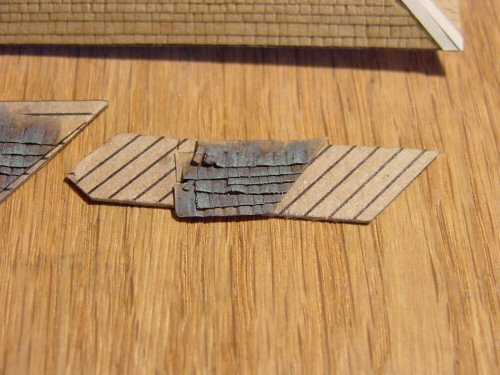
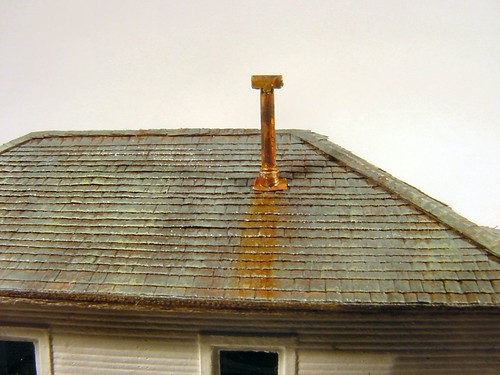
While building Ark Number 4 for the Tiburon Railroad-Ferry Depot Museum I needed to make a weathered wood shingle roof.

Ark number 4 in place in museum

Here’s the recipe I came up with.

  • Apply Campbell Shingles or other paper/wood shingle material
  • Ink-alchohol wash lightly
  • Dry brush Tamiya XF-66 LIGHT GREY
  • Dry brush Tamiya XF-23 LIGHT BLUE, followed immediately by more ink-alchohol
  • Very lightly dry brush Tamiya XF-21 SKY
  • Highlight with china white pencil
  • Seal with Dullcote
  • Add more highligts with ink-alchohol and very small brush

Hindsight: airbrushing a control color to tone down the contrast would have made the effect a bit better.

The final result on the model:

Roof of Ark #4

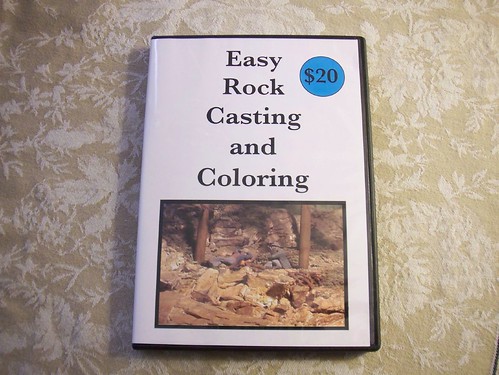
Easy Rock Casting and Coloring DVD by Darryl Huffman

Darryl Huffman's DVD

How did you do those rocks?
.

This was Darryl’s topic sentence for this how-to video. This looked perfect for me since the point I’m at on my layout is how am I going to do all those rocks!? 

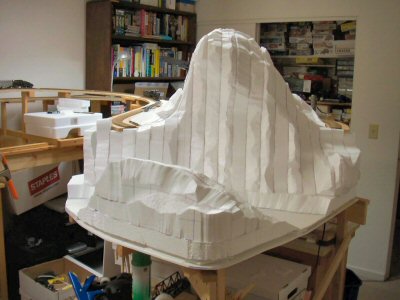
I’m building an HO standard gauge version of Crazy Horse Canyon from Malcolm Furlow’s San Juan Central on my layout. I’ve got the shape of the scenery roughed out in Styrofoam but I’m stuck on the step of actually building whole area up with rock castings.

The questions I needed help with were things like: How do you handle the seams between castings to cover large areas? How do you color everything?

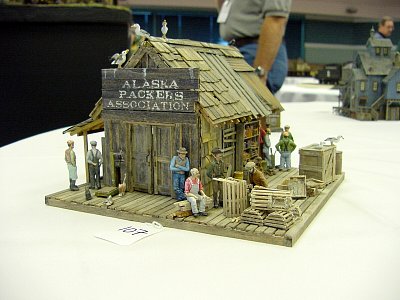
Darryl is a regular contributor to several of the model railroading Yahoo! groups and I have seen many photos of his work from there and his contest entries at the Narrow Gauge conventions.  Below is a structure he built and entered in the modeling contest at the 2004 Narrow Gauge Convention.


I ordered the DVD directly from Darryl on his website and it arrived within a few days.

The 70 minute video is divided up into five chapters about making, blending, and coloring rock castings plus one neat extra chapter about how to use colored crushed plaster to make talus slopes and bunches of rocks and gravel.

Even though I’m using casting foam instead of plaster for my rocks, almost everything Darryl demonstrates easily translates into that material.

Darryl’s DVD does a great job at making the process feel approachable and yields great results. At $20 plus $5 shipping I think it’s a great value too.

Order direct from Darryl at his website http://www.darrylhuffman.50megs.com/custom.html

Picture 003

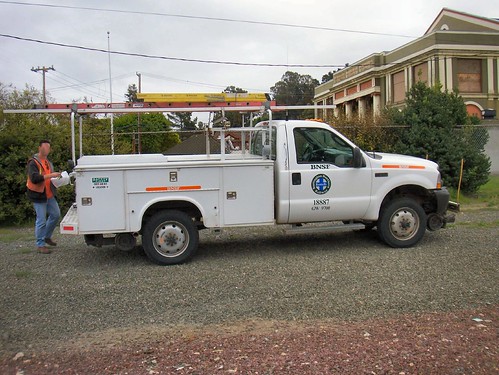
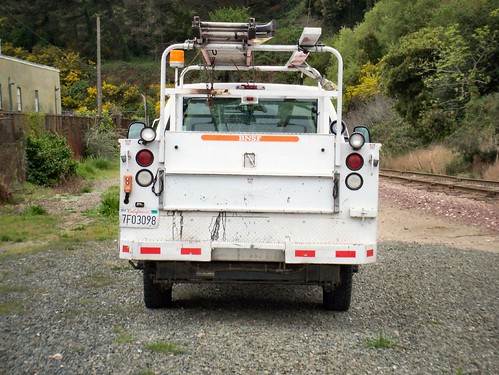
This nice Ford road-rail truck caught while the driver was picking up his lunch in Point Richmond, California.

The track of the truck’s wheels always looks narrow on these road-railers since they need to match standard gauge tracks.

HiRail truck

Picture 002

Previous road-rail truck posts:

More Hy Rail trucks

Neat BNSF HY Rail Truck

« Previous PageNext Page »