Sun 10 Dec 2006
Sun 12 Nov 2006
Starting the scenery for Crazy Horse Canyon
Posted by Daniel Swearingen under Bridges , Crazy Horse Canyon , SceneryComments Off
So far I’ve framed the canyon area and made a rough design plan for the bridge. Now I’m starting to rough in the scenery.
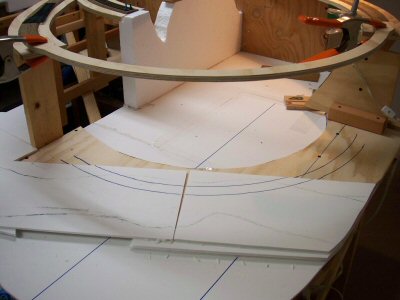
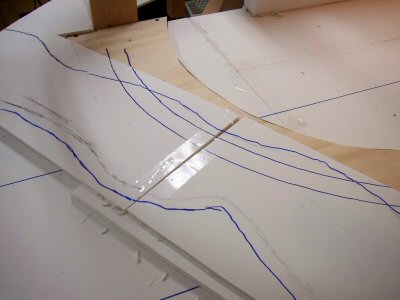
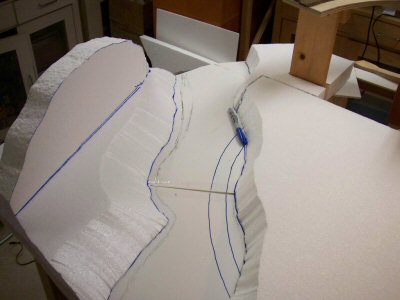
First I put down a couple pieces of foam core board to be the riverbed and sketched out outlines of the shore.
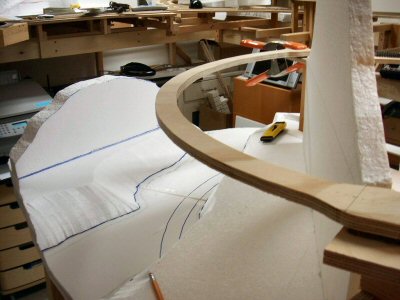
Then I cut some 2-inch bead board to fit these lines and the outline of the bench work (I’m going to need to start thinking about fascia material soon!). I use a hot knife and a hot wire cutter to do all my cutting.
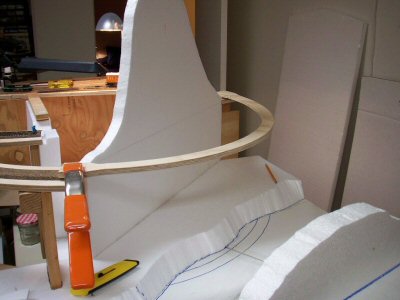
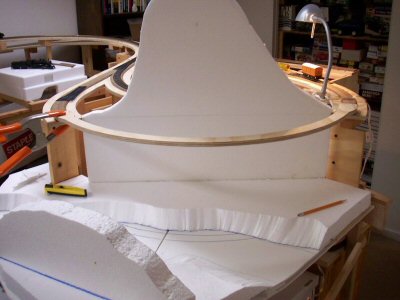
Once I had these flat pieces secured I cut some profile pieces to establish the high points.
Now I need to get some rock castings going.
Sun 5 Nov 2006
Designing Crazy Horse Bridge
Posted by Daniel Swearingen under Bridges , Crazy Horse CanyonComments Off
Now that I’ve framed out Crazy Horse Canyon it’s time to start designing and building the bridge.
Building a big bridge like this is a bit of a chicken/egg exercise. The bridge is actually dictated by the track plan. The scenery is dictated by the bridge but the scenery must be laid down under and around the bridge before the bridge is installed and the bridge legs will have to be adjusted on installation to match the actual contour of the terrain.
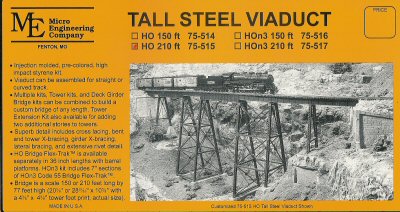
I plan on using two Micro Engineering “Tall steel viaduct” kits to build the steel bridge along Crazy Horse canyon.
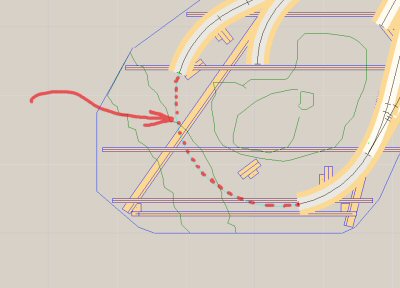
The total bridge length is 37 inches or 268 scale feet. It is also a continuous 18” radius turn and covers 118 degrees. I’m using two Micro Engineering kits; a 150 ft number 75-514 and one 210 ft kit 75-515. Between them I have plenty of parts.
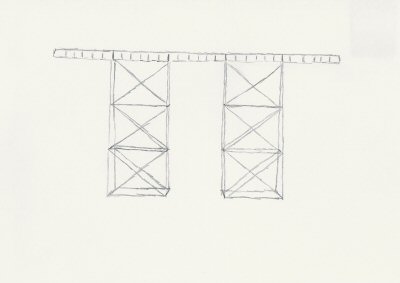
I really like the Micro Engineering kits but a want a taller, more spindly appearance to the bridge. Following the kit instructions will yield a bridge with proportions like this:
However, I’m going to shorten the tower spans and thereby make the bridge towers have a more tall/narrow look.
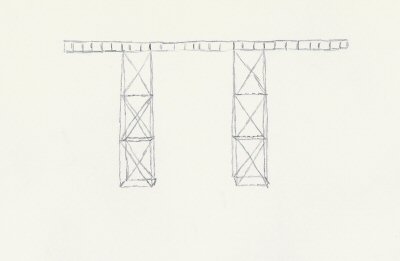
The “engineering justification” for this is that the piers have to be rooted in the stream bed and this makes for smaller concrete piers in the stream. This is simply a fiction to justify what I feel are more pleasing proportions.
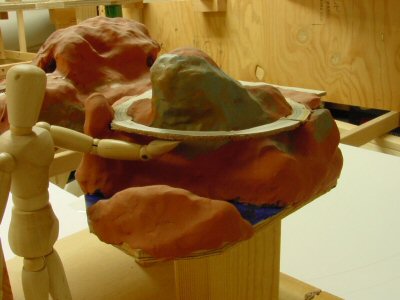
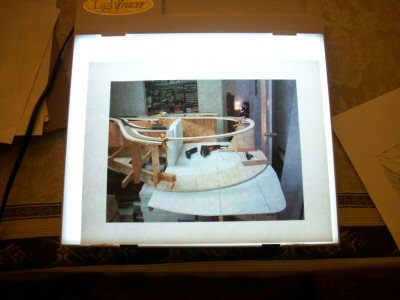
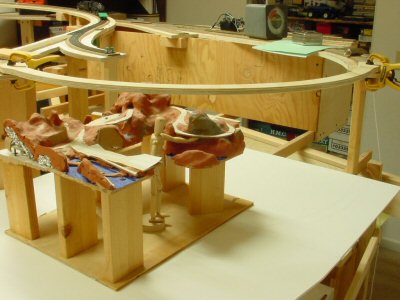
I have my planning model (photo a top of article) to show basic contours of the scenery but now I want to think about how the bridge will actually look in this scenery.
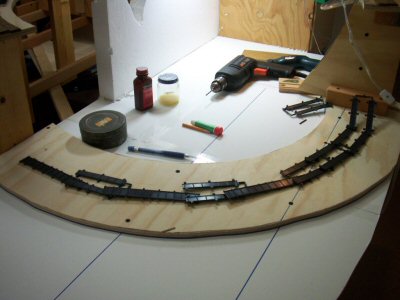
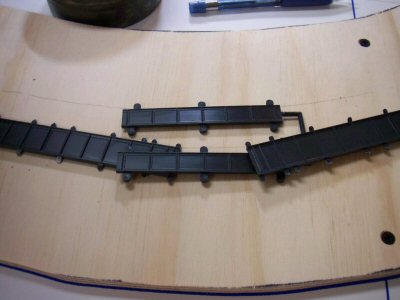
I laid out the pieces of the bridge to get a rough idea how many piers would be needed and roughly where they would be located.
I overlapped the pieces where the towers would be to roughly account for where I was going to shorten the tower spans. This is just for scenery planning so it only needs to be accurate to the nearest inch or so.
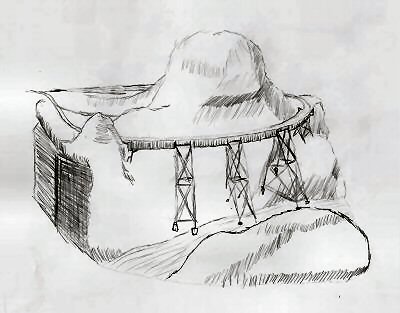
Now take this rough layout of parts and use it to guide a sketch of the bridge and the scenery around it.
Acquiring basic drawing skills really helps you build better models. Pelle Søeborg’s article “Visualize your layout” in the November 2006 MR shows a very effective technique you can use when designing your layout. Søeborg shows using a picture of your layout and then use that as a guide to trace in a sketch of how the area will look with scenery. This is a great fast technique.
I started with this photo I shot of the area around the bridge.
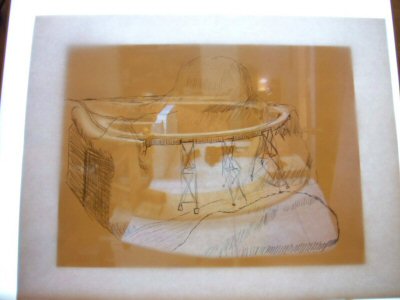
Pelle uses tracing paper but I have a small light table made mainly for tracing and it allows me to use regular paper for my drawings.
Here I’ve taken a print of a photo and placed it on the table.
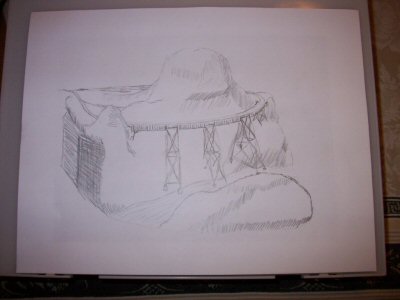
Then I sketched in the track locations, the bridge and the terrain around the bridge. s
I turn off the light table every now and then to make sure I’ve added everything I wanted.
Once I’m done I take the drawing to my scanner and make a high resolution scan.
Next is the placement of rock castings and building up foam scenery structure.
Sat 4 Nov 2006
Magazine review: Model Railroad News
Posted by Daniel Swearingen under Books & Mags , Product Review[2] comments / Leave a comment
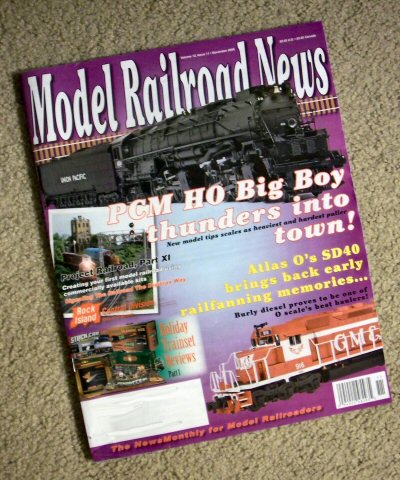
I found an ad somewhere for this magazine Model Railroad News (MRN) and went to their website where I signed up for their “3 free issues” offer. MRN has been published since 1995 so while it was new to me it’s not really a new magazine.
For this review I looked over their “About MRN” page and decided that this part of their description most accurately describes what Model Railroad News does:
“Model Railroad News provides timely, in-depth coverage of new products, model railroading news, and includes highly regarded product reviews.”
MRN has chosen a pretty tight focus and within this focus I think they do a good job. They do not do “how to build my first 4×8 layout” or “buying my first air brush.” What you find here is lots of news about what manufacturers are doing and the product reviews are detailed and very well photographed.
After reading my three free issues I must agree that MRN’s explicit focus on product reviews and industry news works much better than Model Railroader’s implicit semi-random move in the same direction.
If this sounds interesting to you I recommend you try out the three free issues. I know from corresponding with some people around my “What’s messed up with Model Railroader” series that this magazine could be exactly what they are looking for.
Sat 4 Nov 2006
Which model locomotives get mass produced and the affect on the hobby
Posted by Daniel Swearingen under Layout Design , Model Railroading1 comment / Leave a comment
The locomotive is not just what makes the train go, it’s the thing that dictates everything about your layout: turntable size, minimum radius of curves (and turnout frog number), engine house size.
All of these are dictated by the size of locomotives you *want* to run. Availability of locomotives ends up dictating other crucial choices like the railroad being modeled and era – if you want to faithfully model a particular railroad during a particular time you can be stymied by the lack of appropriate model locomotives.
Why is this an obstacle? Of all the things a model railroad needs the locomotive is the one item that is the hardest to build from scratch. Therefore locomotives are the one item where the modeler is the most reliant on manufacturers and importers to supply what the modeler wants.
I model the 1920s and consider myself an advanced modeler. I have no problem building freight cars, passenger cars, houses, boats, bridges, track, power supplies, DCC electronics, layout wiring, etc.
But scratchbuilding a locomotive worries me — mainly because it is so easy to do it badly. The level of precision and design required in making a reliable mechanism (especially in the smaller scales) is very high. For this very same reason, there are only a fairly small number of mass-produced locomotives available.
It is an expensive proposition to bring a mass produced model locomotive to market. In the 1960s, as labor costs rose and the quality and detail demanded by the modeling consumer rose it became extremely expensive, and therefore extremely risky for manufacturers to bring new models into the market. From the 1970s through the early 1990s there were very few new mass produced models introduced.
During this period the batch production brass market thrived. These importers reduced the risk of bringing out a new model by making small batches. While the cost for these items was high, so was the quality.
A recent change is that China currently provides very cheap labor for manufactured goods and this has been applied to the production of mass produced model locomotives that sometimes approach the quality of batch-produced brass models but at 10-20% of the cost (hundreds of dollars versus thousands of dollars).
Despite this opportunity I do not see manufacturers taking advantage of this situation by bringing out a wider range of locomotives. Take for example the fact that there are now at least FOUR models of the 4-8-8-4 “Big Boy” available (Trix, Athearn, Precision Craft, Rivarossi), two USRA Mikados, etc. I agree that there are more new locomotives available, but it seems like manufacturers are still being very conservative.
In the HOn3 Group at Yahoo! (http://groups.yahoo.com/group/HOn3/) there was a thread going about what eras people model and what models get commercially produced. In particular there were calls for more (or ANY) early narrow gauge locomotives in HOn3 such as basic Baldwin 4-4-0s and 2-6-0s.
These small engines were popular on narrow gauge lines from their beginnings in the 1870’s-1880’s through to around WWI. By then, most surviving narrow gauge railroads had started moving to heavier motive power: 2-8-0’s, 4-6-0’s, and especially big 2-8-2’s typified by the D&RG K-class engines. These later, larger engines are really just about all you can get in HOn3.
Has anyone tried making HOn3 engines produced in China like Bachmann’s excellent HO models? Yes, and guess what they produced: D&RG K-class Mikados.
Why be so conservative?
Maybe it’s the customers fault? In the same thread on the HOn3 group mentioned above several people estimated that a retail price for a classic 3-foot gauge Baldwin 4-4-0 would be $250 with a “street price” of something like $150. This tracks closely to the pricing of Bachmann’s new modern standard gauge 4-4-0s.
When the same group was asked how much they would be willing to pay for a classic 3-foot gauge Baldwin 4-4-0, the response seemed to be “much less than that.”
I can see that marketing to model railroaders is not for the faint of heart.
Sun 29 Oct 2006
Framing Crazy Horse Canyon
Posted by Daniel Swearingen under Bridges , Crazy Horse CanyonComments Off
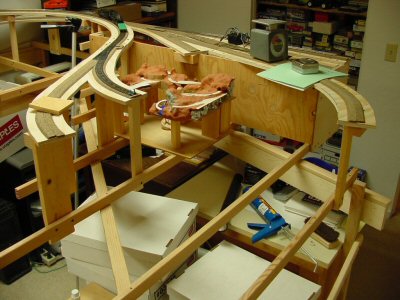
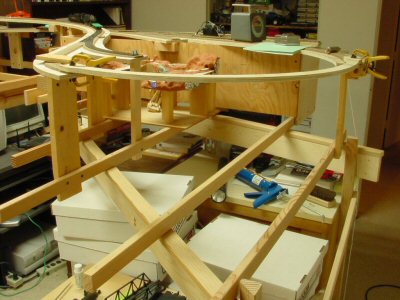
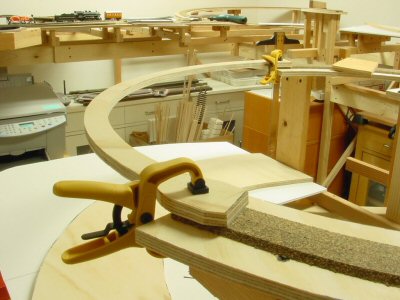
A photo of my planning model. Following Malcolm Fulrow’s San Juan Central, one of the return loops spans a deep canyon with a bridge that also completes 118 degrees of the loop.
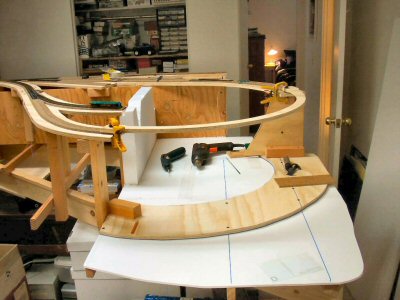
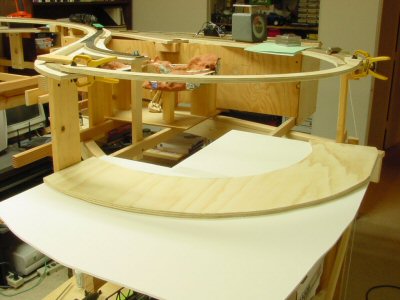
Here we see the yawning gap where the bridge, river, and a canyon will be built. While I was cutting out roadway I carefully cut a piece of 1/2–inch plywood to be a template for the bridge. Below I’ve clamped it temporarily into place.
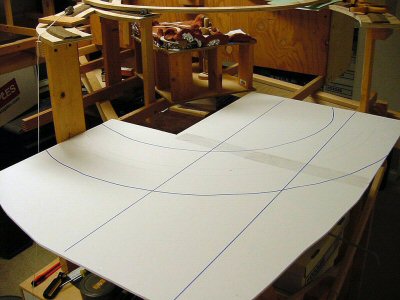
I’m building up my scenery from Styrofoam but I decided it would be nice to have a base to work up from so I cut a couple pieces of foam core board to fit the area. Before attaching to the frame I traced out where the underlying studs were and traced out an 8-inch wide semicircle where I would lay down plywood to be a firm footing for the bridge.
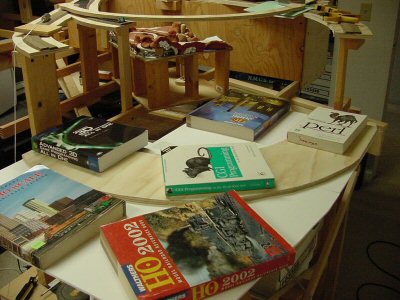
Using construction adhesive and drywall screws I attached the foam and the wood to the bench work and weighted everything down with books until the adhesive set.
Using the bridge template I can see that I’m really going to like how the is going to look.
Next step is to get the river and scenery roughed in. Below I’ve placed the planning model below the bridge template.
Mon 23 Oct 2006
Trickle Theory: Just do a bit now…
Posted by Daniel Swearingen under Model Railroading , UncategorizedComments Off
Agh!
It is so hard to keep making progress on a big “spare time” project like my model railroad in the face of life’s distractions. You know: work, family, chores, sleeping, new computer games, etc.
I generally hate posts of other people’s posts but a guy at work passed this link around recently and it has really helped me. Summary: just grab something, anything, and do it: Rands In Repose: Trickle Theory
The examples are geared towards software developers (my day job) but I feel this appraoch is applicable to anyone who feels overwhelmed by the tasks in front of them.
As an example, this morning I was kicking myself for not getting “more” done. There are two issues in that statement: I actually get a lot done, it’s just that I spend a lot of time doing things that are not really that important in the long run.
Just Grab Something and Do It
This morning I spent 30 minutes and processed images I shot in July and got them ready for posting to the blog as a layout building progress report. I feel better already.
Sun 22 Oct 2006
